The correct hosting for MODx your hands

The topic talks about setting up a fast and inexpensive hosting for MODx Revolution. Basically, things here are described common, so that information suitable for any CMS. Later was assembled, and the video version of this manual.
In any case, make video, how to work the admin panel of MODx Revo.
For fast and comfortable work desirable:
the
-
the
- Fast browser — Google Chrome. Admin Revo is a blazing fast the
- Good Internet channel. There is no options, one always has. the
- Quality of the hosting about it and write.
At the end of the post there are links to scripts to automatically install MODx with the creation of user, host nginx, process php5-fpm and the database.
I worked with different hostings. Started on the Peterhost then moved Clodo, then Selectel parallel Scalaxy. Also did some work with Hetzner.
All good, but on the totality of subjective things I like the cloud Selectel.
Turned out "of mnogabukav", so here's the contents:
1. Installing and configuring ssh
2. Installation services
3. customizing the environment
4. configuring services
5. Conclusion
the
Installing and configuring ssh
Register on selectel.ru go in the panel, where the "Cloud" and create a car.
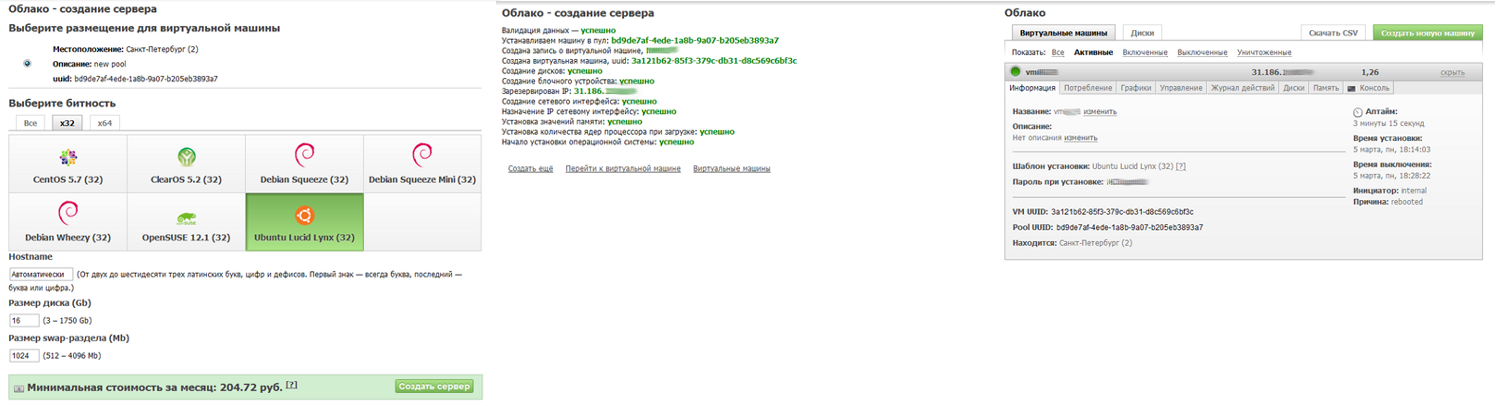
To install I take Ubuntu x32 (eats less RAM than x64). OS installation is about 15 minutes, after it in the properties of the machine looking for "Password during the installation". This is the root password.
Go to the server via Putty. In the settings of the Translation set to UTF-8.
User: root
Password: panel
First create a new user and add it to the sudo group:
the
adduser user
adduser user sudo
Then cut the log on to the server under root.
the
nano /etc/ssh/sshd_configOf the exposed PermitRootLogin no, you can also hang the ssh on a different port, but I don't.
Restart ssh:
the
service ssh restartNow you can relogin as user and work using sudo.
The first thing
the
sudo apt-get install mcsudo mcAt this point, most non-Linux users RPG elements prettier with the blue Windows, instead of a black console. While the console still can be viewed by pressing Ctrl+O.
From this point the command can be entered without the sudo — you are already working in the mc.
A bit set firewall.
Create a file iptables (touch /root/iptables), introduced into it the following lines:
the
iptables -A INPUT -p tcp -m state --state NEW --dport 22-m recent --update --seconds 30 -j DROP
iptables -A INPUT -p tcp -m state --state NEW --dport 22-m recent --set-j ACCEPT
The 22nd is the protection port from the brute passwords. For each unsuccessful attempt to try they will be able to only 30sec (can be increased) — at these speeds did not pick up. Also, you want to guess another user name (root, we have disabled).
Make it executable sudo chmod +x /root/iptables
And make a call to this file in /etc/rc.local and the script will be called at startup. In General, everything that you want to start write here.
the
Repositories
Put python-software-properties for easy adding of repositories
the
apt-get install python-software-propertiesDabavljaet repoitory Nginx and php5-fpm:
the
add-apt-repository ppa:nginx/stable
add-apt-repository ppa:fabianarias/php5
apt-get update
apt-get install nginx php5-fpm mysql-server php5-mcrypt php5-mysql php5-curl php-db php5-gd unzip
When installing you will need to enter the administrative password for Mysql — come up with more difficult, remember and enter.
Half the battle is done.
the
preparing the environment
As you may have guessed, our server will run php via php5-fpm without Apache2.
This gives us 2 advantages: less memory usage and running multiple sites from different users. That is, you are breaking one of the site — others will not suffer.
FTP to the server, we did not found because to fill in the site files we will be using SFTP (use WinCSP for this), and edit using Notepad++ (there is a plugin for sftp).
Create a group sftp (addgroup sftp) and set up to access it via ssh.
Appended to the end of /etc/ssh/sshd_config
the
Subsystem sftp internal-sftp
Match Group sftp
ChrootDirectory %h
AllowTCPForwarding no
ForceCommand internal-sftp
And comment there.
the
#Subsystem sftp /usr/lib/openssh/sftp-server
Create a new directory for the future of the site (and the directory for temporary files), create a user for it, add it to the sftp group and assign the home directory:
the
mkdir /var/www
mkdir /var/www/site1
mkdir /var/www/site1/www
mkdir /var/www/site1/tmp
adduser site1
adduser site1 sftp
usermod -d /var/www/site1 site1
There is a directory that has a user that has access to it through the sftp.
the
configuring services
For the php settings want to edit /etc/php5/fpm/php.ini.
the
post_max_size = 100M
upload_max_filesize = 100M
disable_functions = exec,passthru,shell_exec,system,proc_open,popen,curl_multi_exec,parse_ini_file,show_source
cgi.fix_pathinfo = 0
open_basedir = /var/www/
The main configuration file Nginx (/etc/nginx/nginx.conf) driven to such a mind (old becaem):
the
user www-data;
worker_processes 8;
error_log /var/log/nginx/error.log;
pid /var/run/nginx.pid;
events {
worker_connections 1024;
}
http {
include /etc/nginx/mime.types;
client_max_body_size 100m;
access_log /var/log/nginx/access.log;
sendfile on;
keepalive_timeout 65;
tcp_nodelay on;
gzip on;
gzip_min_length 1000;
gzip_proxied any;
gzip_types text/plain ext/html text/xml application/xml application/x-javascript text/javascript text/css text/json;
"gzip_disable" "msie6";
gzip_comp_level 8;
charset utf-8;
include /etc/nginx/conf.d/*.conf;
include /etc/nginx/sites-enabled/*;
}
Next in /etc/nginx/fastcgi_params comment the line about https, and not then will complain:
the
#fastcgi_param HTTPS $server_https;Nota Bene! Create a virtual host.
Our configuration loads sites from the directory /etc/nginx/sites-enabled/, but there are /etc/nginx/sites-available/ (there is now a link to the site default — nail it).
In the first directory are symlinks to the active sites configuration files from a second directory. This approach allows you to quickly enable / disable virtual hosts without editing — just removing the\by creating a symlink.
Standard config of the site /etc/nginx/sites-available/site1.conf
the
upstream backend-site1 {server unix:/var/run/php5-site1.sock;}
server {
listen 80;
server_name site1.domain.ru;
root /var/www/site1/www;
access_log /var/log/nginx/site1-access.log;
error_log /var/log/nginx/site1-error.log;
index index.php;
rewrite_log on;
location /core/ {
deny all;
}
location / {
try_files $uri $uri/ @rewrite;
}
location @rewrite {
rewrite ^/(.*)$ /index.php?q=$1;
}
location ~ \.php$ {
include fastcgi_params;
fastcgi_param SCRIPT_FILENAME $document_root$fastcgi_script_name;
location backend-site1;
}
location ~* ^.+\.(jpg|jpeg|gif|css|png|js|ico|bmp)$ {
access_log off;
expires 10d;
break;
}
location ~ /\.ht {
deny all;
}
}
Here, once enabled friendly urls, static content processing and php via php5-fpm, which is declared backend (1 line config).
Another website you can create just by copying and changing this config site1 to site2.
After creating the config do not forget to create a symbolic link to the config:
the
ln-s /etc/nginx/sites-available/site1.conf /etc/nginx/sites-enabled/site1.confNota Bene! Create process php5-fpm for the website.
Basic configuration in /etc/php5/fpm/main.conf we will not touch, just to make sure that the bottom of the file there is a line
the
include=/etc/php5/fpm/pool.d/*.confIt connects from the directory configuration process php5-fpm. In the configuration of the site we have already pointed out that *.php he will give to the processing at /var/run/php5-site1.sock, and now create the config /etc/php5/fpm/pool.d/site1.conf:
the
[site1]
listen = /var/run/php5-site1.sock
listen.mode = 0666
user = site1
group = site1
chdir = /var/www/site1
php_admin_value[upload_tmp_dir] = /var/www/site1/tmp
php_admin_value[soap.wsdl_cache_dir] = /var/www/site1/tmp
php_admin_value[date.timezone] = Europe/Moscow
# here the values can be changed, depending on the load on the site
pm = dynamic
pm.max_children = 10
pm.start_servers = 2
pm.min_spare_servers = 2
pm.max_spare_servers = 4
Everywhere carefully check the correctness of paths and restart the services:
the
service nginx restart
service php5-fpm restart
the
Conclusion
Footcloth text to get noble, so about the installation site read here, and let me tell you that we have left.
We set up a quick, inexpensive server in the cloud, with pay-per-consumption, which is very economical eats resources. To add sites you need:
1. To create directories and the user of the website, user add to group sftp.
2. Create 2 config for Nginx and php5-fpm in the image of the previous one.
3. To establish a site and assign the user owners of files.

I have on that server hangs 7 small sites. It uses 250-300mb of RAM (this is configured in the panel selectel) and cost about 8-10 $ a day. When I was going through small gebrettert I paid only 20 rubles per day.
The sites are isolated from each other, each working from its user, with limited rights. The same user goes through sftp there is no problem with editing files via ftp bathed in the admin.
For simplified management of sites and their configs through the web interface is great Ajenti. Well, anyway, it's a lot of other things.
In General, I tried to write is available, how it is possible for 300 roubles a month to make a hosting for your work with MODx Revolution.
If something not so — correct me in the comments.
PS Script to assign permissions for directories\files. I recommend storing in /var/www/site1/chmod
the
#!/bin/bash
user=site1
dir=/var/www/$user/www

chown-R $user:$user "$dir";
find "$dir" -type d-exec chmod 0755 '{}' \;
find "$dir" -type f -exec chmod 0644 '{}' \;
P. P. S.
In the comments, again, all hell broke loose. People in eyes not seeing what Revo tell it brakes.
Sorry, but the outrage got and the topic was severely sharedactions.
Quotes from the old version will slip in the comments.
I wrote an article about the hosting setup and I do not want to hide it in drafts due to individual commentators who have never worked with MODx, but authoritative judge video.
Warning!
The review sports a hardened Troll dmitriid that with MODx it has never worked. I beg you, don't feed it!
Updated. rewrote the scripts unattended installation\removal from jkenters
When you use these scripts you only need to install packages on the server, configure ssh, php, and basic nginx configuration in this article. All the rest of the script will do automatically.
Video scripts
the
-
the
- Install In the beginning you need to specify the root password of Mysql. At startup it asks for a user name, password, and domain of the site. At the end displays the passwords from Mysql and SFTP. the
- Update Also need to specify the Mysql root password. Asked the name of the user of the website for updates. the
- Remove Asked the name of the user of the website. Removes all files and the database and also the user from the server.
For proper installation of MODx, you need to specify the date.timezone in /etc/php5/cli/php.ini
the
date.timezone = Europe/Moscow


Comments
Post a Comment